Connecting the Westpac Group Pinpad to your WiFi network involves searching for WiFi networks from the pinpad, then entering the WiFi Passphrase and entering any other details requested by the pinpad during the WiFi setup process.
As part of the WiFi setup, the pinpad will need to be assigned with a static IP address (via IP address reservation through your router).
Finally, once the pinpad is connected to the WiFi network, the pinpad can be paired with the Idealpos POS terminal.
The below steps outline the process of connecting the Assembly pinpad to your WiFi network.
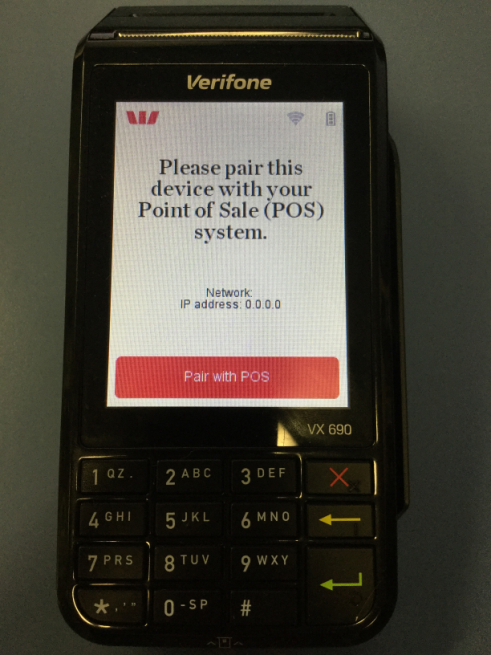
The IP address of the terminal will be displayed below the 'Please pair this device with your Point of Sale (POS) system.
If the IP address shows 0.0.0.0 or if the IP address begins with 169, the Pinpad will need to be joined to your Wi-Fi network.
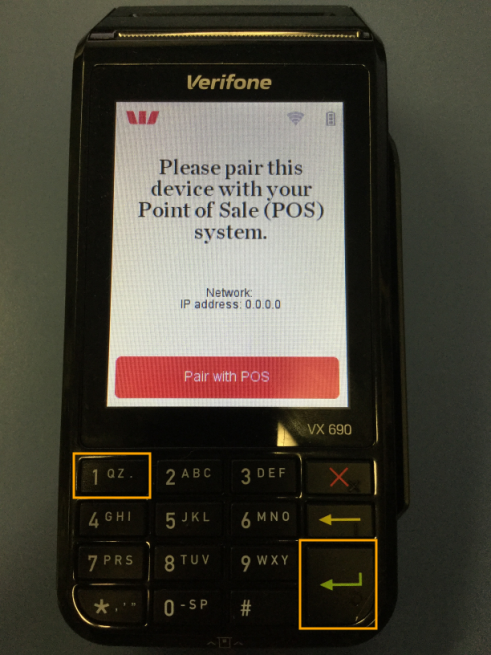
To configure the Pinpad, press 1 + Enter at the same time.
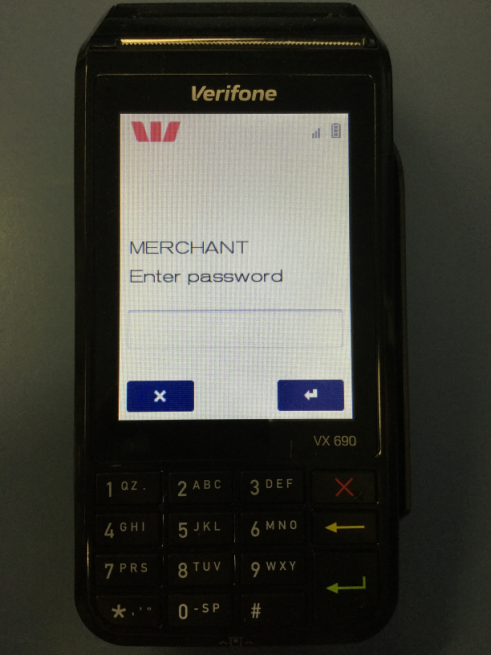
Enter the Merchant Password.
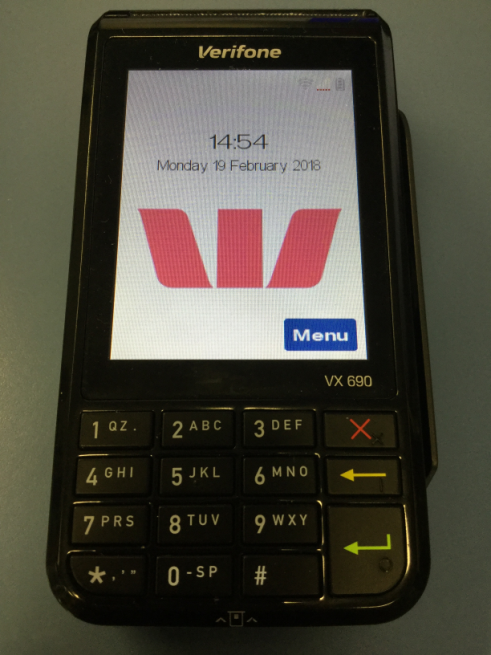
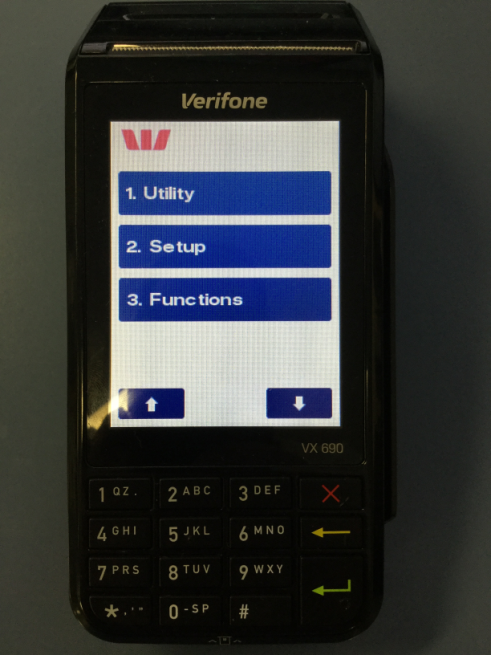
Press the Menu button on the Pinpad touchscreen to enter the Menu.
Press the down arrow on the Pinpad screen until you see the following screen which shows an option called '1. Utility'.
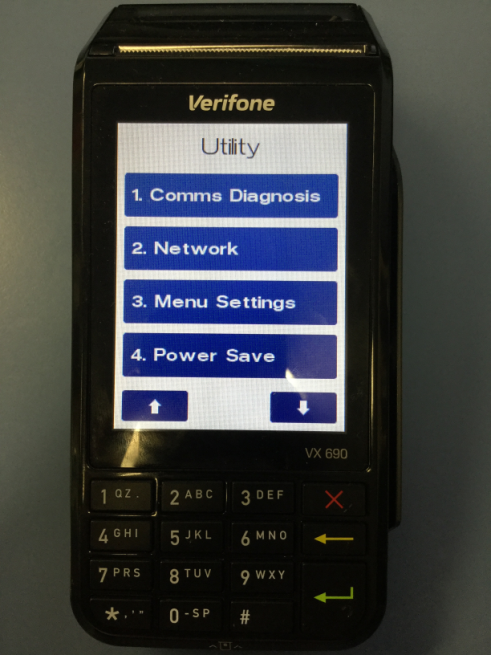
Press '1. Utility', then press the down arrow on the Pinpad screen until you see the following screen which shows an option called '2. Network'.
Press '2. Network', then the following screen will appear.
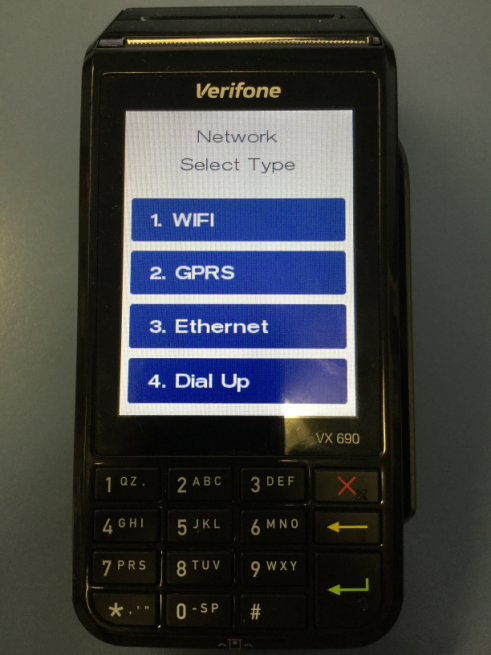
Select '1. WIFI', then the following screen will appear. The number 2 option will show the last WiFi network the Pinpad was connected to.
Therefore, the number 2 option may not appear if the Pinpad is new and has not been previously connected to a WiFi network.
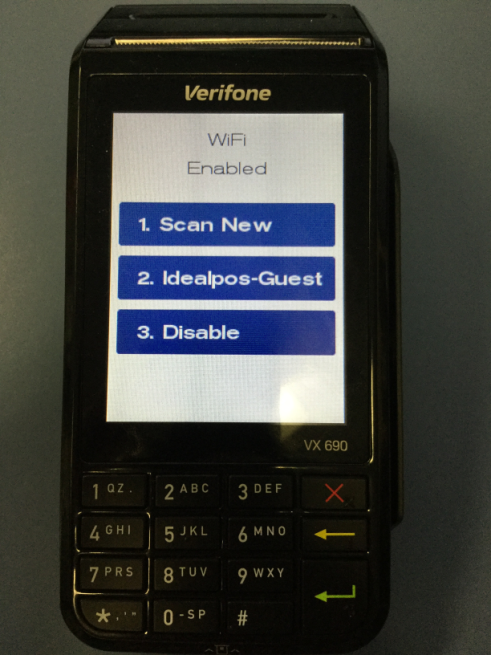
If 'WiFi Enabled' is displayed at the top of the above screen, press '3. Disable' to disable the WiFi network.
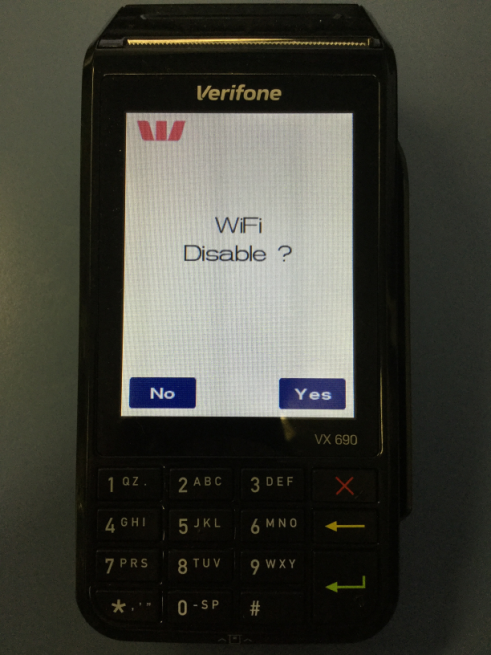
Press 'Yes' to disable WiFi. The Pinpad will briefly show the following screen while the WiFi network connection is disabled.
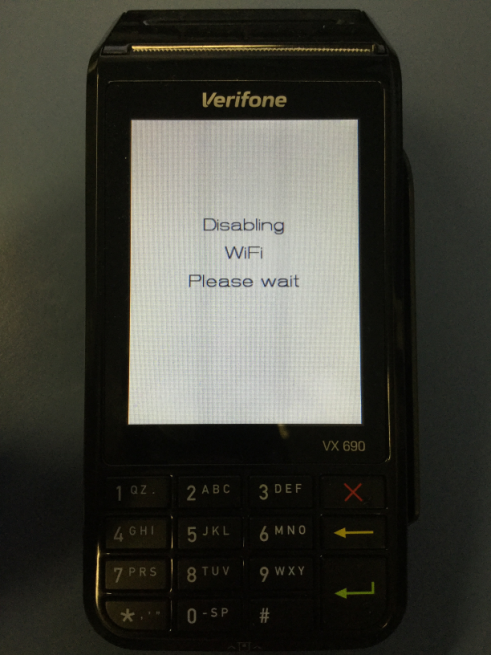
After WiFi is disabled, you will return to the main screen.
Press the Menu button on the Pinpad touchscreen, then repeat the process above until you arrive at the WiFi screen which shows the option '1. Scan New'.
Press '1. Scan New'

The Pinpad will scan for WiFi networks.
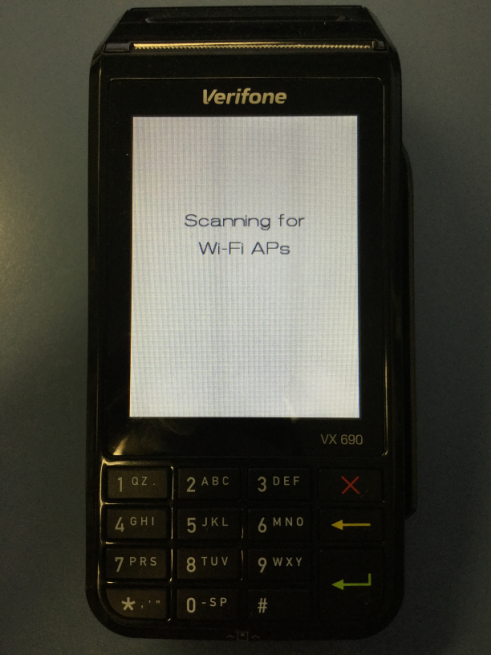
After WiFi networks have been scanned, you will see a list of available WiFi networks.
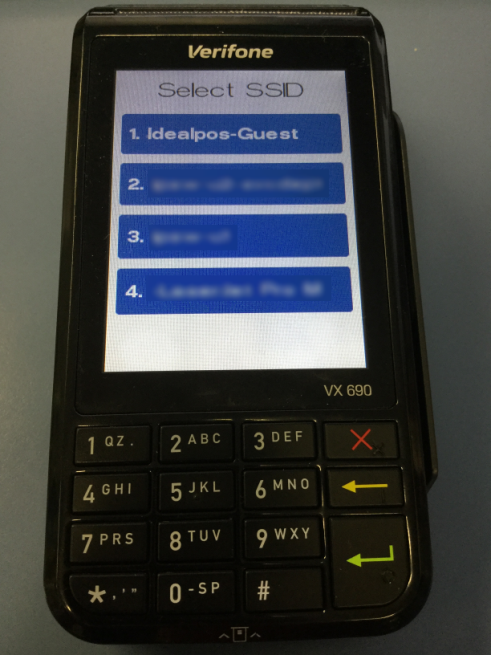
Select your WiFi network from the list by either tapping on it on the touchscreen or pressing the number on the numeric keypad that corresponds to the WiFi network you want to connect to.
After selecting your WiFi network, you will be prompted to enter the WiFi password.
The password is entered via the numeric keys on the pinpad. Each numeric key shows the available characters for that key.
Press each key multiple times to toggle through the available letters/symbols for that key.
Remember that the WiFi password is case sensitive and to toggle between upper case and lower case letters, simply continue pressing the same button on the pinpad until you see the lower or upper case character that you need. If you need to enter multiple characters from the same key one after another, you will need to wait for the character to turn into an asterisk (*) before you press the key again, otherwise you will continue to toggle between the available characters for that key.
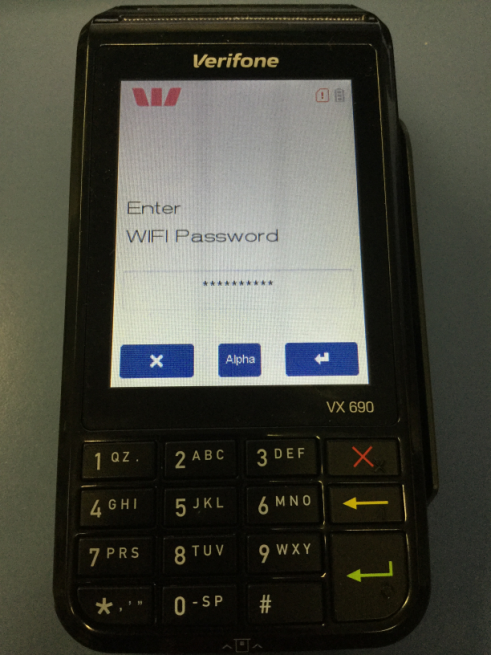
After you have entered the WiFi password, either press the Enter button on the touchscreen or press the physical green enter button.
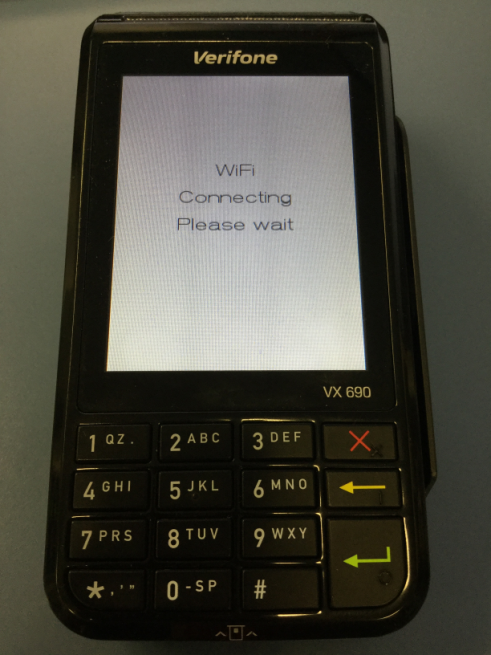
The Pinpad screen will show 'WiFi Connecting Please Wait'.
After the WiFi connection has been established, the Pinpad will briefly show a screen similar to the below.
This screen will then automatically disappear if you don't press any keys.
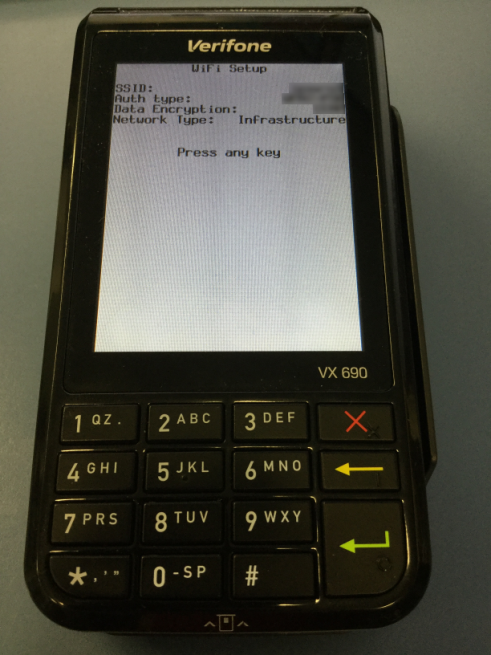
The Pinpad has now been connected to the WiFi network.